
Fust Survival Beginner Guide: From Beach to First Base
Last updated:
Your first priority in Fust Survival is a small base where you can store supplies and respawn. Start by gathering Wood, Stones and Cloth, then build an enclosed shelter with a locked entrance, a supplied Tool Cupboard and a Sleeping Bag.
Your First Priorities on the Beach
You spawn with a Rock for gathering and a Torch for light. Work toward a compact shelter you can close, maintain and return to after death. A larger building consumes more resources before you have secured the supplies inside it; expensive equipment can wait until you have somewhere to store it.
These default controls cover the opening tasks:
| Control | Action |
|---|---|
| 1–6 or mouse wheel | Select a hotbar item |
| Left mouse button | Swing the Rock to gather |
| Tab | Open Inventory |
| Q | Open Crafting |
| E | Interact, open or pick up |
Choose SHOW ME THE BASICS on the welcome screen to open the eight-page tutorial, then select LET'S GO to return to play. Press F3 or choose GUIDE in the upper-left corner to reopen it. MENU opens the main menu.
For item transfers and other shortcuts, use the controls and inventory guide. If you are still choosing where to play, compare server regions and modes before investing in your first base.
Gather Wood, Stones, Cloth, Food and Water
Gather your building materials while keeping enough food and water to stay active:
- Wood: Equip the Rock, approach a tree and left-click the trunk. Aim for the marked weak spot, such as the red X, to break the target faster.
- Stones: Strike a Stone Node with the Rock. Wood and Stones support your early tools and building pieces.
- Cloth: Approach Hemp and press E at the PICK UP prompt. Reserve 30 Cloth for a Sleeping Bag and extra Cloth for Bandages, which cost 4 Cloth each. Spending all your Cloth on equipment delays your base respawn point.
- Food: Pick up wild Mushrooms with E. To eat food, put it on your hotbar, equip it and left-click.
- Water: Stand in fresh water and press E to drink. Keeping food and water sufficiently filled also lets health recover slowly.
The opening targets of 200 Wood and 100 Stones are Starter Goal milestones. Keep gathering beyond them: your building pieces, door, locks and Tool Cupboard require additional materials.
For food effects and healing choices, see the food, water and healing guide.
Complete the Seven Starter Goals
The Starter Goals checklist on the left side of the screen tracks these milestones automatically:
- Gather 200 Wood.
- Gather 100 Stones.
- Craft a Building Plan. Finish crafting the item to complete this goal.
- Place a foundation. Equip the Building Plan and place the building piece.
- Place a door. Install it in the matching entrance opening.
- Place a Tool Cupboard. Put the crafted cupboard inside your base.
- Place a sleeping bag. Deploy it inside the shelter.
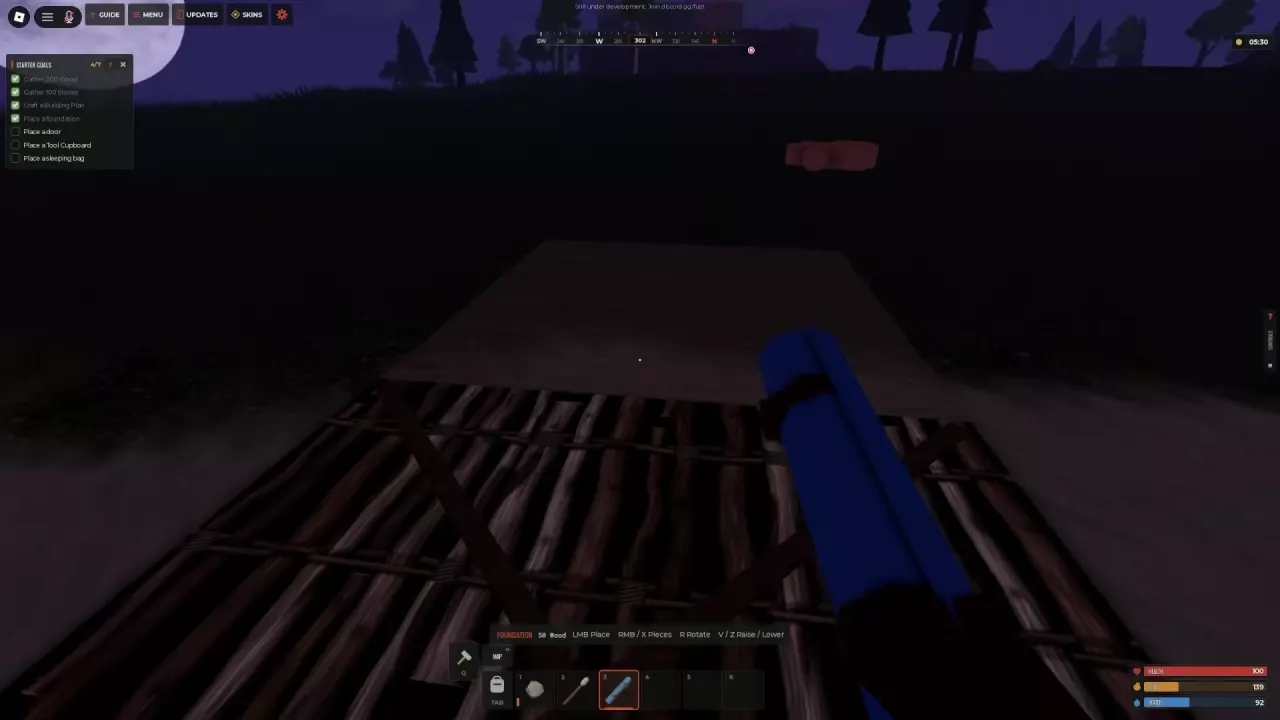
The resource goals show gathering progress. The foundation, door, Tool Cupboard and Sleeping Bag goals require placement; leaving crafted items in your inventory does not complete them. After gathering both resource targets, crafting the plan and placing a foundation, the checklist reaches 4/7, with the three remaining placement goals still open.
HIDE GOALS on the final tutorial page hides the checklist; it does not complete the remaining tasks. Follow the shelter steps below to finish the placements and make the base usable.
Build, Lock and Supply a Small Shelter
Build the enclosed shell
- Craft a Building Plan for 20 Wood. Press Q, select Building Plan and click CRAFT. No workbench is required. Move it to your hotbar and equip it.
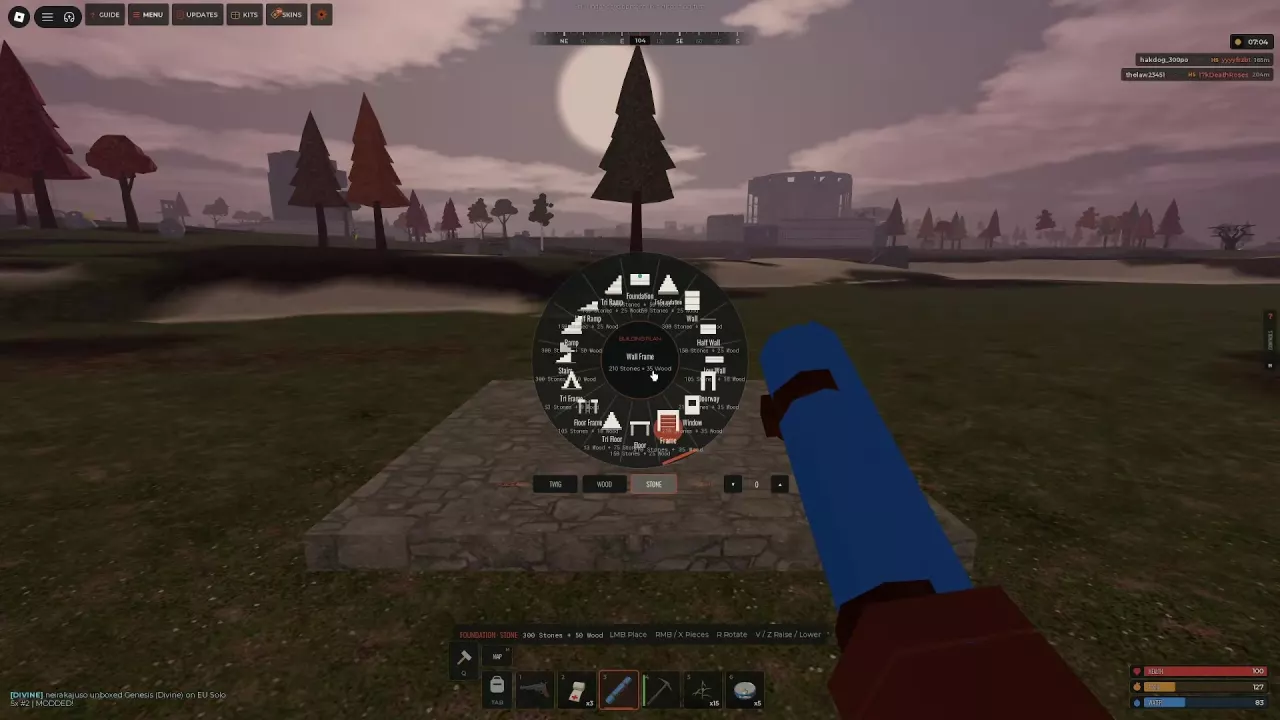
- Choose a foundation and material. Hold right mouse button or X, move the cursor to a piece and release to select it. You can also click the right mouse button and then click a piece. The wheel offers Twig, Wood and Stone; carry the materials shown for your selection.
- Position and place the foundation. Aim at the ground, press R to rotate, use V/Z to raise or lower it, and left-click to place. If the preview says Too close to a spawn point, move farther from the spawn area.
- Enclose the space. Snap walls to the foundation edges and leave a Doorway for your entrance. Select Floor and aim above the walls to cover a square opening; use Triangle Floor for a triangular opening.
- Install a Wooden Door. Craft it for 300 Wood, equip it and aim at the Doorway. Left-click when the placement prompt appears. A Wooden Door needs a Doorway; a double door uses a Wall Frame. If the prompt says Look at a doorway, reposition your aim at a suitable opening.
Twig is easy to destroy. Prepare a Hammer and upgrade it early rather than leaving valuable supplies behind a fragile shell. Keep the first build small; the solo starter base guide covers a stone 2×2 layout and a two-door airlock for a more protected entrance.
Lock the entrance and supply the Tool Cupboard
- Craft Key Locks for 75 Wood each. Prepare one for the entrance and another for the Tool Cupboard. Equip a lock from your hotbar, aim at the door or cupboard and attach it. It is placed locked, and you and your team automatically have the key. Press G while aiming at the mounted lock to inspect its interface; only the owner can manage it.
- Craft and place the Tool Cupboard. The 10x server recipe costs 1,000 Wood and requires no workbench. Equip the TC, position it inside the shelter and left-click to place it. Use R to rotate or hold Shift for free placement, then attach its lock. The TC prevents other players from building nearby and holds your upkeep resources.
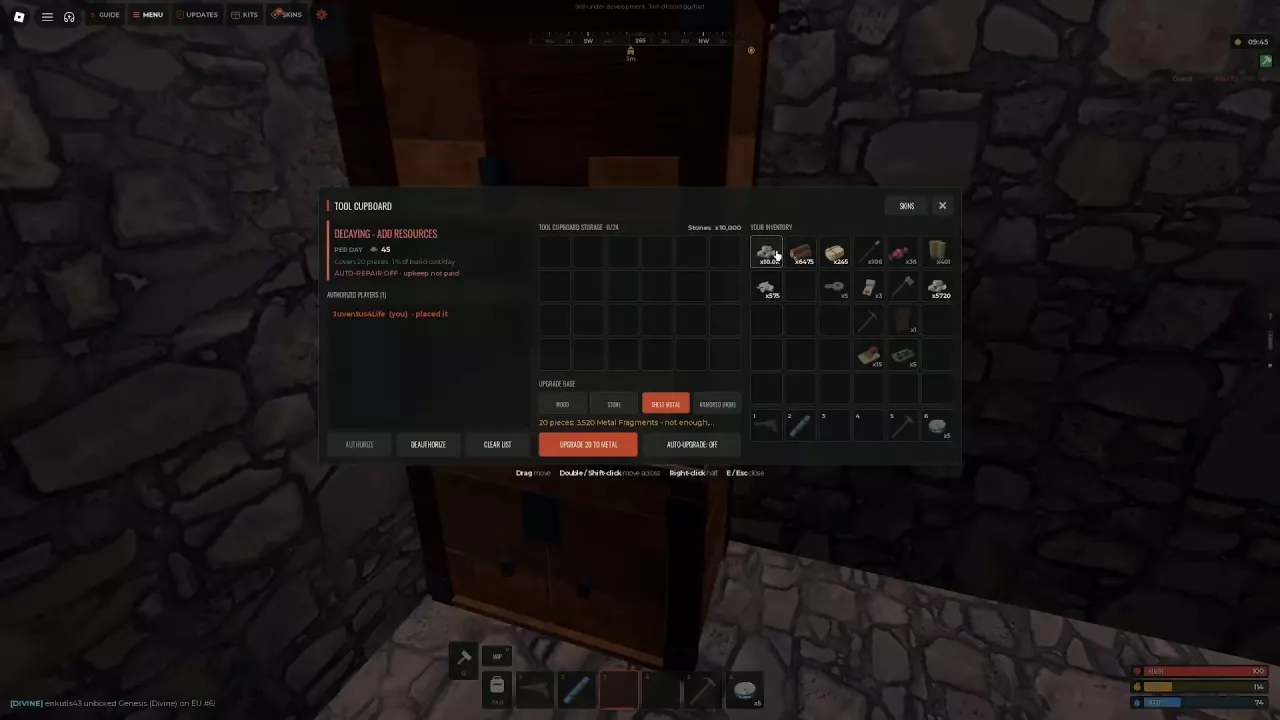
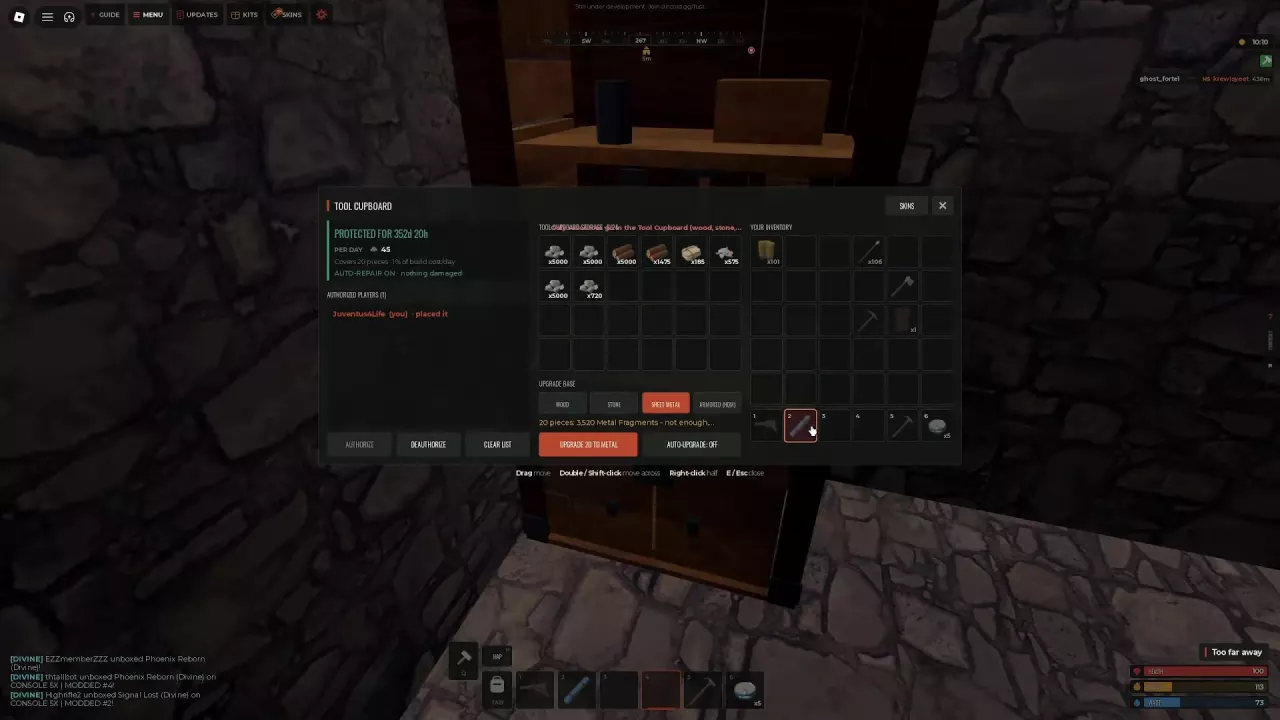
- Pay upkeep. Aim at the TC and press E. Read PER DAY, then transfer the required materials from your inventory into the cupboard. Drag items across or use double-click or Shift-click to transfer them. Look for the PROTECTED FOR status and its remaining duration.
An empty TC does not pay upkeep. DECAYING means the base is losing protection because the required upkeep is unpaid, allowing building pieces to deteriorate. Recheck the daily requirements after expanding or upgrading, and keep upkeep materials in the cupboard. The Tool Cupboard guide explains ongoing authorization, maintenance and repair management.
Add a respawn point and storage
Craft a Sleeping Bag for 30 Cloth, with no workbench required, then equip and place it inside the base. After death, choose its entry in the Sleeping Bags list when it says READY. An entry showing a cooldown must become available before you can use it; RESPAWN ON BEACH remains a separate option.
Add a Wood Storage Box for spare resources and equipment. Its 10x Quickcraft recipe costs 100 Wood, and it has 18 storage slots. Place it inside, aim at it and press E OPEN to deposit supplies. You can fit it with another Key Lock. Keep the route from your entrance to your storage, TC and Sleeping Bag accessible.
Prepare Your First Supply Trip
Store surplus materials and valuables before leaving. Death costs your carried items, so take equipment that serves the trip and leave your reserve supplies at home.
- Top up food and water, and pack food and healing supplies. Keep Bandages available instead of spending every piece of Cloth on crafting.
- Bring suitable gathering tools. A Stone Hatchet improves Wood gathering; use a pickaxe for Stones and ore when you obtain one. These upgrades help replenish the resources your base consumes.
- Match ammunition to your weapon. Bring arrows with a bow or compatible ammunition with a gun before committing to a dangerous area.
- Close your entrance and leave upkeep stocked. Return to store useful loot before risking it on another outing.
Choose your next investment according to what you need:
- More crafting options: Work toward Workbench Level 1 and use recipes within its required range. Follow the crafting and workbench guide for its materials and operating conditions.
- Processed building and crafting materials: Add a Furnace to smelt ore into materials such as Metal Fragments. It needs fuel, including Wood or Coal.
- Loot and stronger weapons: Start with a bow and its arrows, then work toward better equipment through looting. On a 10x server, the solo railway progression guide covers Rail Depot and Trainyard routes, combat preparation and returning loot to base.
Prioritize a repeatable supply trip over carrying your best gear into every fight. Replacing a modest loadout is easier when your stored resources and respawn point are already in place.