Fust Survival Raiding Guide and Raid Cost Chart
Last updated:
A successful raid starts with enough explosives to reach useful loot. Check the barriers between your entry point, storage and Tool Cupboard, then choose a route you can afford to finish.
Prepare and Identify the Useful Route
Bring weapons, matching ammunition, healing supplies and enough explosives for the route you intend to take. Leave inventory space for loot and store unrelated valuables at home: dying puts your carried items at risk. On Modded servers, prepare for opponents who already have stronger weapons and armor.
Inspect the base before committing explosives. Look for an entrance that leads toward storage or the Tool Cupboard (TC), which maintains the base. Count the doors, walls and other barriers between that entrance and your goal. A cheap first opening is useful only if you can also get through what follows it.
An E OPEN prompt on a High Wooden Gate does not bypass its Key Lock. Without the key, the gate stays locked, and only the lock owner can manage that lock. See doors, locks and base defense for how protected entrances work.
Outpost is a no-fighting safe zone.
Raid Costs at the Target's Current Durability
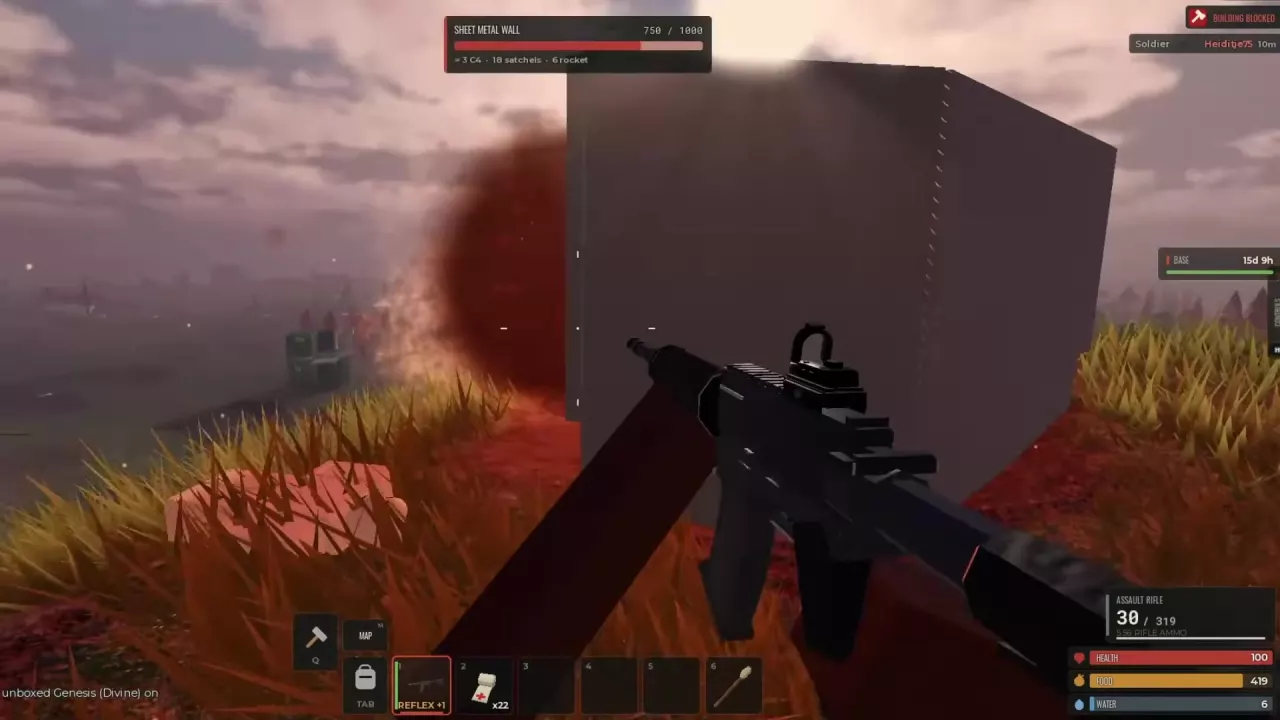
Aim at a structure to read its name, current and maximum durability, and approximate explosive requirements. Match both the structure and its current durability when using this chart.
All quantities below are approximate. Each explosive column is an alternative: a row listing 4 C4, 23 satchels and 8 rockets means approximately 4 C4 or 23 satchels or 8 rockets.
| Target | Current / maximum durability (HP) | C4 | Satchels | Rockets | Server condition |
|---|---|---|---|---|---|
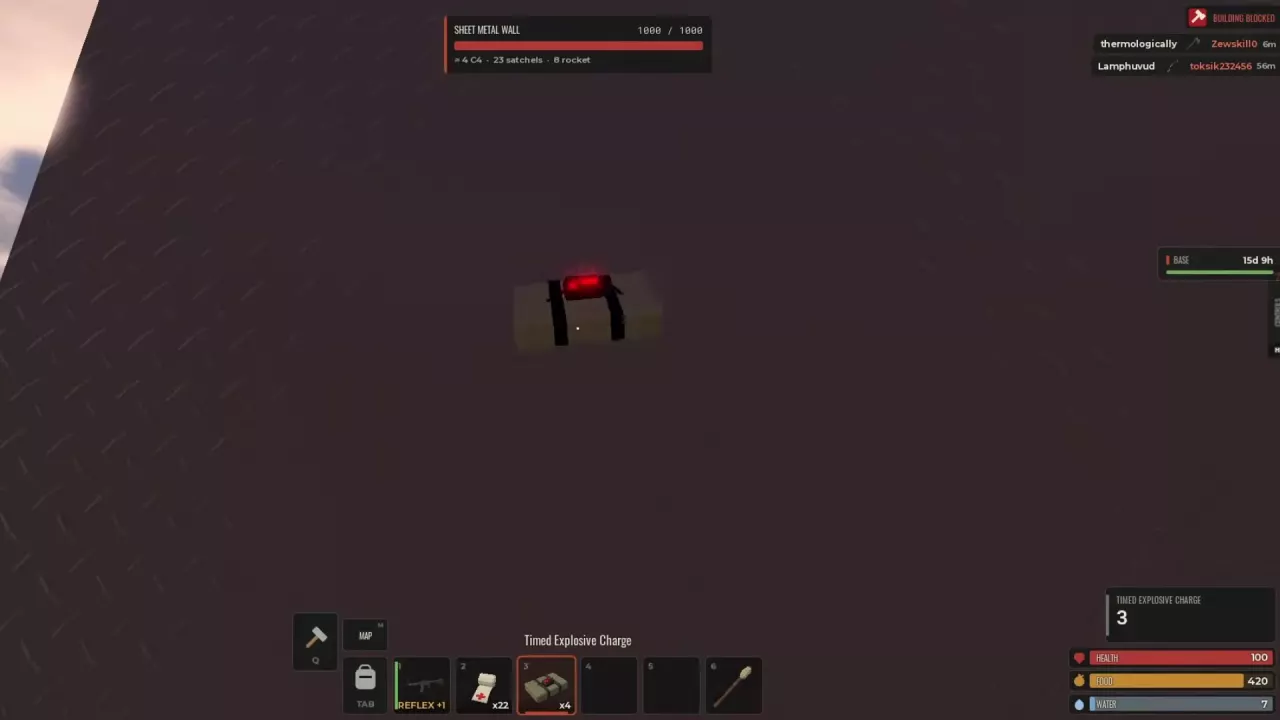
| Sheet Metal Wall | 1,000 / 1,000 | ≈4 | ≈23 | ≈8 | 5x |
| Sheet Metal Wall | 750 / 1,000 | ≈3 | ≈18 | ≈6 | 5x |
| Sheet Metal Triangle Foundation | 1,000 / 1,000 | ≈4 | ≈23 | ≈8 | 5x |
| Sheet Metal Double Door | 1,000 / 1,000 | ≈2 | ≈6 | ≈3 | 5x |
| Stone Triangle Floor | 500 / 500 | ≈2 | ≈10 | ≈4 | 5x |
| Stone Wall | 420 / 500 | ≈2 | ≈9 | ≈4 | 5x |
| Triangle Ladder Hatch | 800 / 800 | ≈2 | ≈6 | ≈3 | 10x |
| Wooden Barricade | Falling from 90 / 250 to 50 / 250 | ≈1 | ≈1 | ≈1 | 5x |
| Wooden Barricade | 147 / 250 | ≈1 | ≈1 | ≈2 | 5x |
| Wooden Barricade | 227 / 250 | ≈1 | ≈1 | ≈2 | 10x |
| Large Furnace | 1,493 / 1,500 and 1,489 / 1,500 | ≈2 | ≈6 | ≈4 | 10x |
| High Stone Wall | 268 / 500 | ≈2 | ≈6 | ≈3 | 10x |
Read your target's current prompt again after damage. The damaged barricade and furnace rows apply to those particular durability states; they are not full-health costs. Use the displayed estimates directly rather than converting them into a fixed damage-per-charge rule.
Compare Routes and Count Your Shortfall
When a full Sheet Metal Double Door and a full Sheet Metal Wall provide otherwise equivalent access, favor the door: its displayed requirement is about 2 C4 versus 4, 6 satchels versus 23, or 3 rockets versus 8. That advantage can disappear if the door leads into more barriers before you reach the loot.
- Identify every barrier that must be destroyed on each possible route.
- Choose the explosive type you intend to use.
- Add that type's current estimates for barriers requiring separate, independent breaches.
- Subtract the quantity you carry to find what you still need.
Shortfall = max(0, required quantity − carried quantity).
For a target requiring approximately 4 C4, carrying 3 leaves a shortage of 1. Carrying at least 4 leaves no numerical shortage against that estimate.
This route total assumes each counted barrier needs an independent breach. It does not account for shared blast damage or repairs, and it is not a formula for combining C4, satchels and rockets. Keep each explosive type's budget separate.
Get and Place Timed Explosive Charges
Get explosives
Timed Explosive Charge, also called C4, can be found in Oil Rig Locked Crates and dropped player backpacks. Satchel Charges can also come from Elite Crates on 10x servers. For crate access and hacking, use the loot crate guide.
Paid kits provide another source on Modded servers:
- Starter Kit: 1 Satchel Charge per claim.
- Survivor Kit: 3 Satchel Charges per claim.
- Soldier Kit: 2 Timed Explosive Charges and 4 Satchel Charges per claim.
- Warlord Kit: 4 Timed Explosive Charges and 6 Satchel Charges per claim. Warlord is unavailable during the first two hours after a wipe.
See kit contents and claim rules for the full comparison and claiming conditions.
Attach C4 and wait for detonation
- Inspect the wall and read its current C4 estimate. A Sheet Metal Wall at 1,000/1,000 HP displays approximately 4 C4.
- Select Timed Explosive Charge in your hotbar and attach it to the target wall. It sticks where it lands.
- Attach the charges needed for your planned breach. Using the last carried charge empties its hotbar slot and can display NONE LEFT.
- Move back and allow the 10-second fuses to finish. A charge attached to the wall has not necessarily detonated yet; the durability display can still show full health during placement.
- Watch for the wall to break, then enter through the opening.
In a four-charge breach of a full Sheet Metal Wall on a 5x server, the wall remained at 1,000/1,000 during placement, later fell to 750/1,000, and then displayed DESTROYED. Wait for the attached charges to resolve before deciding that you need more.
Use a Ladder for a Roof Approach
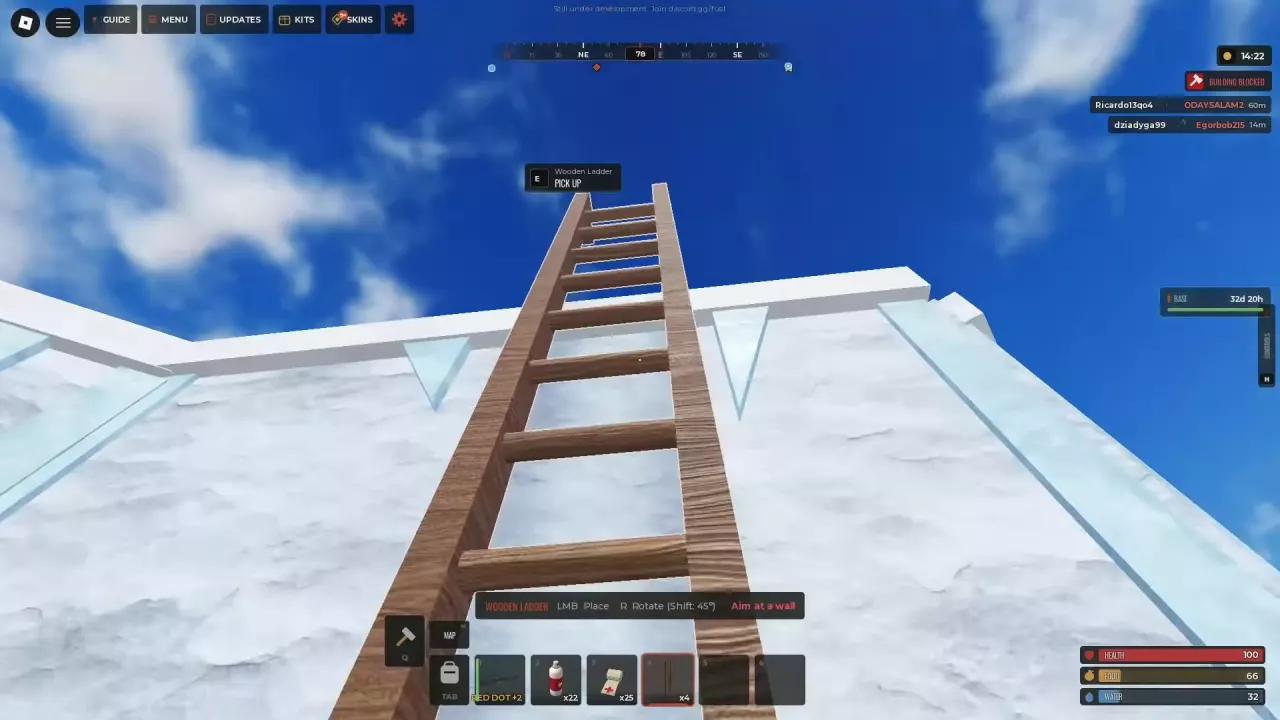
A Wooden Ladder lets you approach from an exterior wall and assess the roof route. This can change which barriers you need to breach, so compare the upper route with the ground entrance before spending explosives.
- Select Wooden Ladder in your hotbar and aim at the exterior wall. If Aim at a wall appears, adjust your placement target.
- Position the ladder. Press R to rotate; hold Shift while rotating for a 45-degree adjustment.
- Use LMB to place it, then climb to the roof and assess the available route and loot.
- To recover a placed ladder, approach it, target it and use E PICK UP.
Climbing exposes you to enemy fire. Check the roof before committing to the ascent and move toward cover once you arrive. While fighting around roof cover, jumping can prevent firing and trigger CAN'T SHOOT WHILE JUMPING. The combat guide covers movement, reloads and healing around cover.
Loot and Hold the Opening
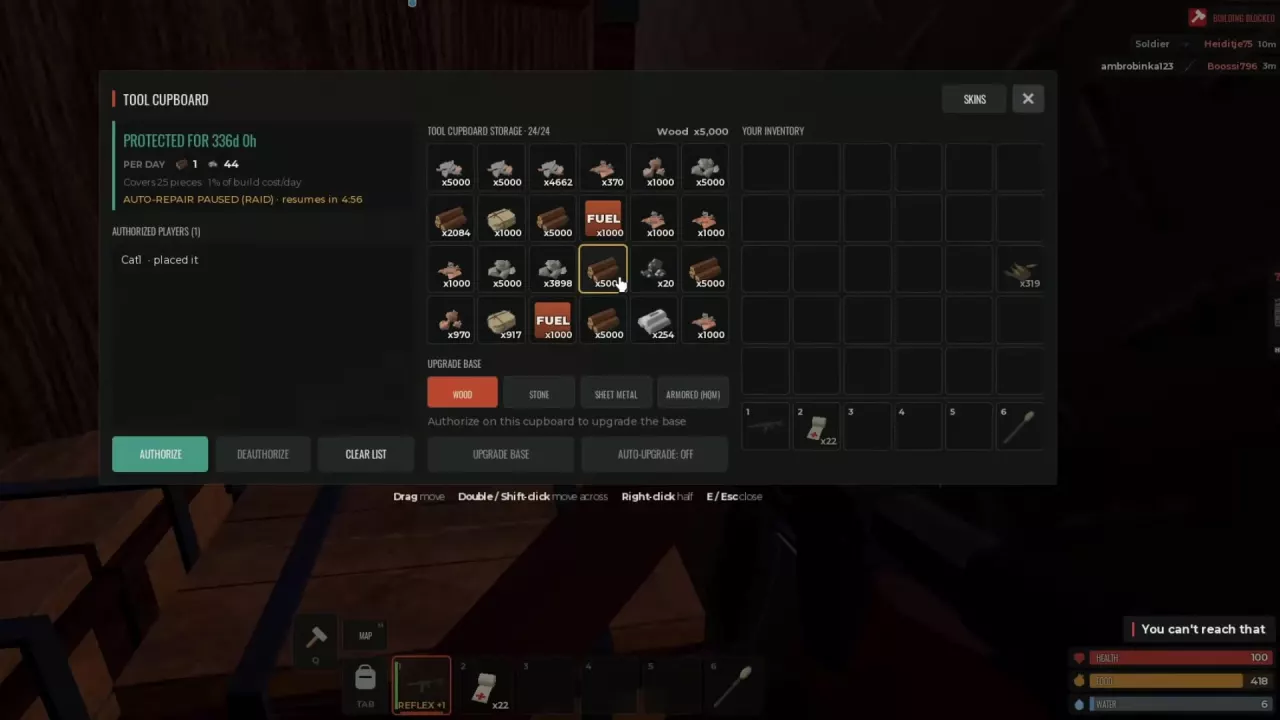
Enter through the breach and locate accessible storage and the Tool Cupboard. Open the cupboard and transfer useful resources into your inventory. In the TC interface, drag items to move them, or double-click or Shift-click to transfer them across; press E or Esc to close it.
Watch the opening and nearby approaches while collecting loot. Use the breach for aimed fire when needed, then return to cover when pressured. An open route into the base also gives other players a route toward you.
Loot access and building authorization are separate. Opening the TC or taking its resources does not authorize you to upgrade the base. Check its authorization status before using upgrade controls; on a Solo server, each TC allows only one authorized player. Entering the base also does not guarantee that you can place building pieces. For construction controls and placement messages, see the building guide.
Raiding pauses automatic repairs. Read the TC's remaining repair countdown to see when repairs will resume; that countdown is time remaining, not the full duration of every repair pause. See Tool Cupboard authorization and repair for ongoing base management.