
Fust Survival Food, Water and Healing Guide
Last updated:
Keep food and water stocked to support slow health regeneration, and carry medical supplies for injuries that need more healing. Wild food, looted cans, Bandages and Med Spray serve different needs on a trip.
Food and Medical Supplies at a Glance
Food replenishes survival resources, while Bandages and Med Spray provide larger heals for injuries. Use the food effects and medical supply details below to plan what to carry.
Raw Meat is a Furnace input for the ORE / FOOD slots. For loading fuel and ingredients, see the Furnace guide.
-
Mushroom
- Food
- 15 Food per item
- Water
- 5 Water per item
- Listed healing
- 3 HP per item (Item description)
- How to get
- Pick up wild Mushrooms with E; Mushrooms can also appear in Guard loot and player backpacks.
-
Can of Beans
- Food
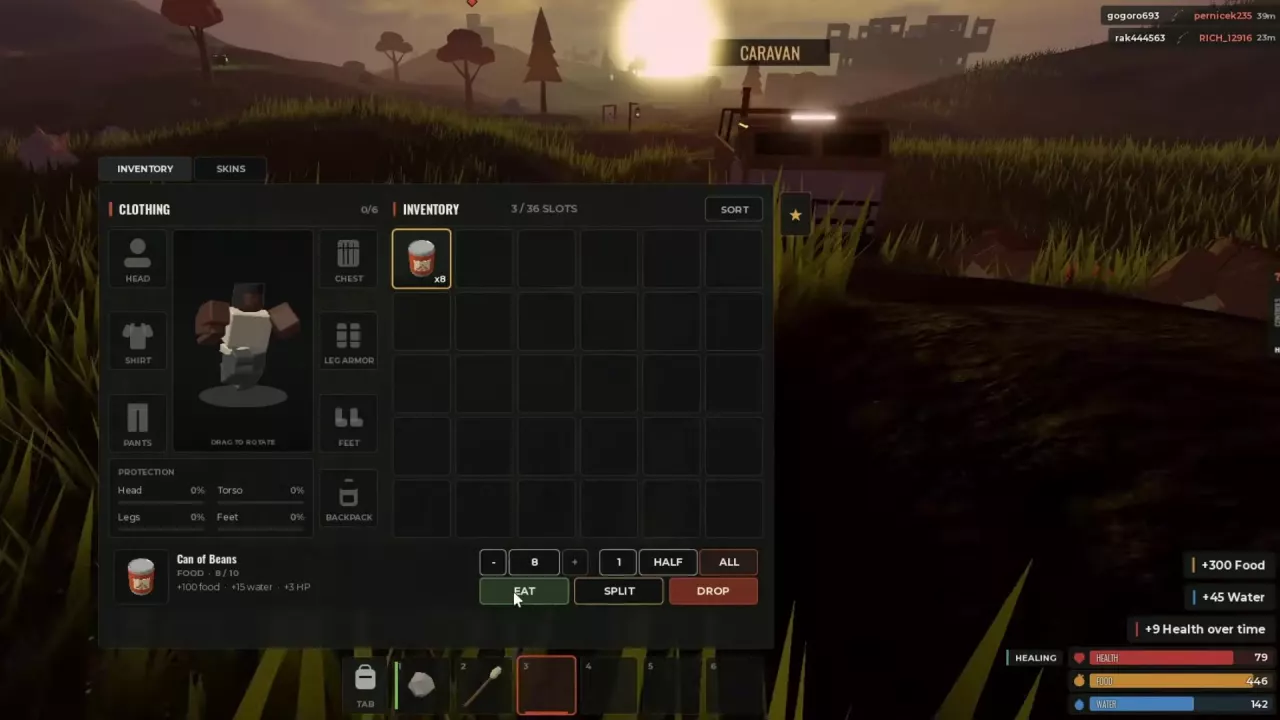
- 100 Food per can
- Water
- 15 Water per can
- Listed healing
- 3 HP per can (Restored over time)
-
Can of Tuna
- Food
- 90 Food per can
- Listed healing
- 5 HP per can (Restored over time)
- How to get
- Can appear in Wooden Crate loot at Trainyard and in player backpacks.
-
Pumpkin
- How to get
- Collect in the wild or obtain from loot, including player backpacks and Witch's Crate.
-
Corn
- How to get
- Can appear in Guard loot and player backpacks. Corn has also been collected during Rail Depot looting and from the ground beside roadside barrels.
-
Bandage
- Listed healing
- 20 HP (5 immediate HP plus 15 HP over time)
- Application time
- 2 seconds
- Cloth required
- 4 Cloth per Bandage
- Requires Workbench
- No
- How to get
- Craft from Cloth; Bandages can also appear in Military Crates, player backpacks, and paid kit claims.
-
Med Spray
- Listed healing
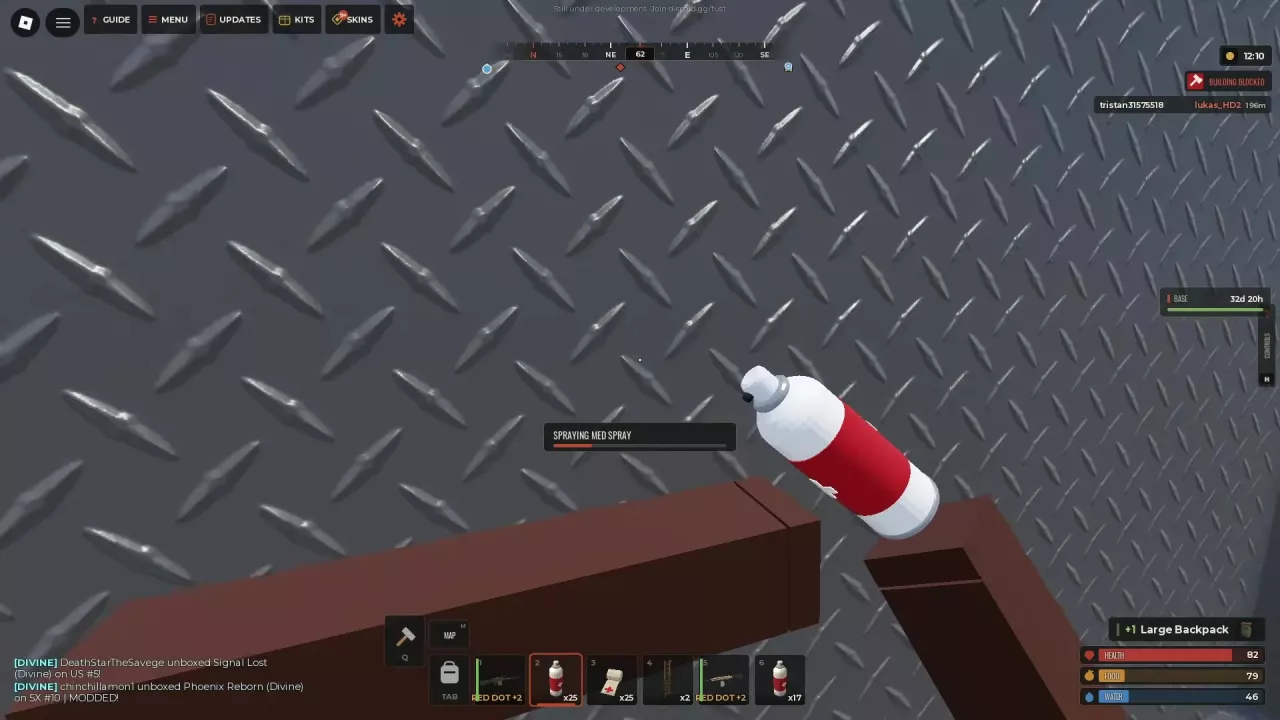
- 35 HP (Handheld use prompt)
- Loot source
- Can appear in player-backpack loot.
-
Raw Meat
- Type
- Food input
- Processing facility
- Furnace
- Input slots
- ORE / FOOD (Furnace interface)
Find Food and Eat It
Approach wild Mushrooms or Pumpkins and press E at the pickup prompt. Looting adds more options: Guards can carry Mushrooms and Corn, and Wooden Crates at Trainyard can contain Can of Tuna. Pumpkins can also appear in Witch's Crates and player backpacks; Corn can turn up in player backpacks, during Rail Depot looting, or on the ground beside roadside barrels.
To eat from Inventory:
- Press Tab to open Inventory.
- Select the food.
- Click EAT.
For hotbar use, place food in a slot, select that slot, and left-click.
Choose food according to what you need:
- Can of Beans for a large food refill and some water. Its 100 Food and 15 Water make it a stronger refill per item than a Mushroom. Its 3 HP restores over time.
- Can of Tuna for food with a little more healing. It provides 90 Food and 5 HP over time, trading some of the Beans' food recovery for a larger heal.
- Mushrooms for smaller top-ups while gathering. Each provides 15 Food, 5 Water and 3 HP, and wild pickups let you restock without opening a loot container.
Drink Fresh Water or Accept the Salt-Water Cost
Stand in fresh water and press E to drink. Near Outpost in the 10x Modded setup, the E DRINK interaction lists +25 Water.
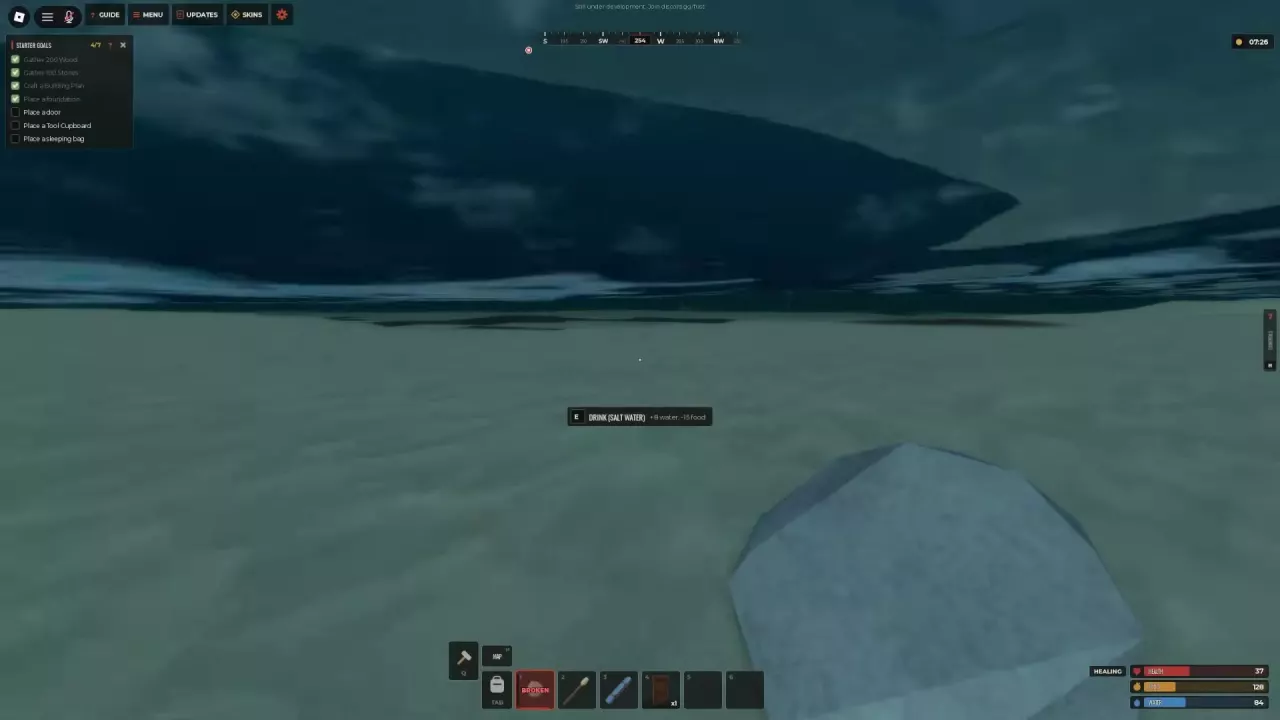
At the coast, read the interaction label before drinking. DRINK (SALT WATER) gives 8 Water and removes 15 Food. Prefer fresh water when available; salt water is a fallback when you need water enough to accept the food cost. That cost comes from drinking, not simply entering the sea.
Plan sea crossings separately from drinking stops. Swimming in Open Sea causes fatigue; the area interface shows water depth and distance from shore, which help you judge how far you are from land.
Natural Healing, Bandages and Med Spray
Keeping Food and Water sufficient enables slow natural health regeneration. Refill both between fights so you can recover while preparing your next move.
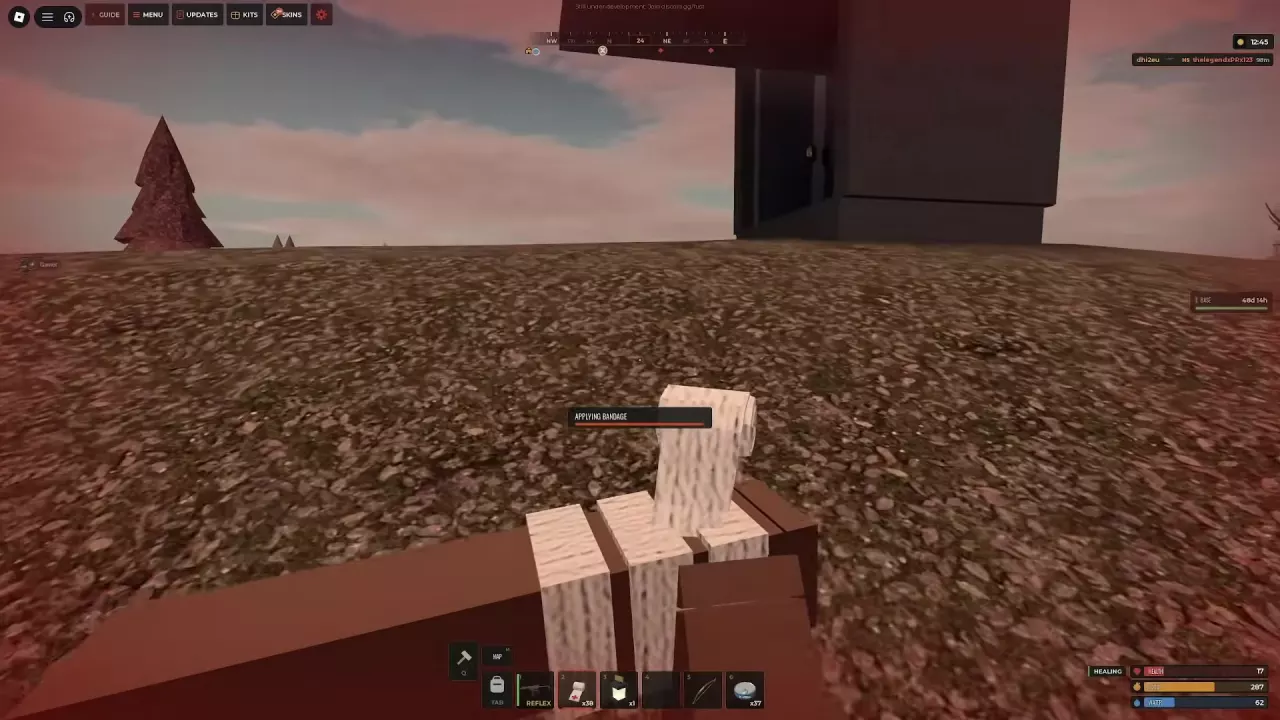
Use a Bandage
- Move behind cover, such as a wall corner, before starting treatment.
- Select a Bandage in your hotbar and left-click.
- Wait 2 seconds for APPLYING BANDAGE to finish.
- Receive 5 HP immediately, then allow the remaining 15 HP to restore over 4 seconds.
The total is 20 HP, so a +5 Health notification is the first part of the heal. HEALING can remain visible while health continues to rise. Give that recovery time to work before stepping back into danger.
Use Med Spray
Hold Med Spray in your hotbar and left-click at APPLY MED SPRAY. Wait through the SPRAYING MED SPRAY progress bar. Its use prompt lists 35 HP, and health can continue rising after application.
Bandages are the practical supply to replenish from Cloth; Med Spray offers a larger listed heal per use when you have it. Bandages can also appear in Military Crates, player backpacks and paid kit claims. Med Spray can appear in player-backpack loot.
At full health, medical items display FULL HP; Bandages may instead say You're at full health. For positioning treatment between attacks and reloads, see the combat guide.
Craft Bandages Before and During a Trip
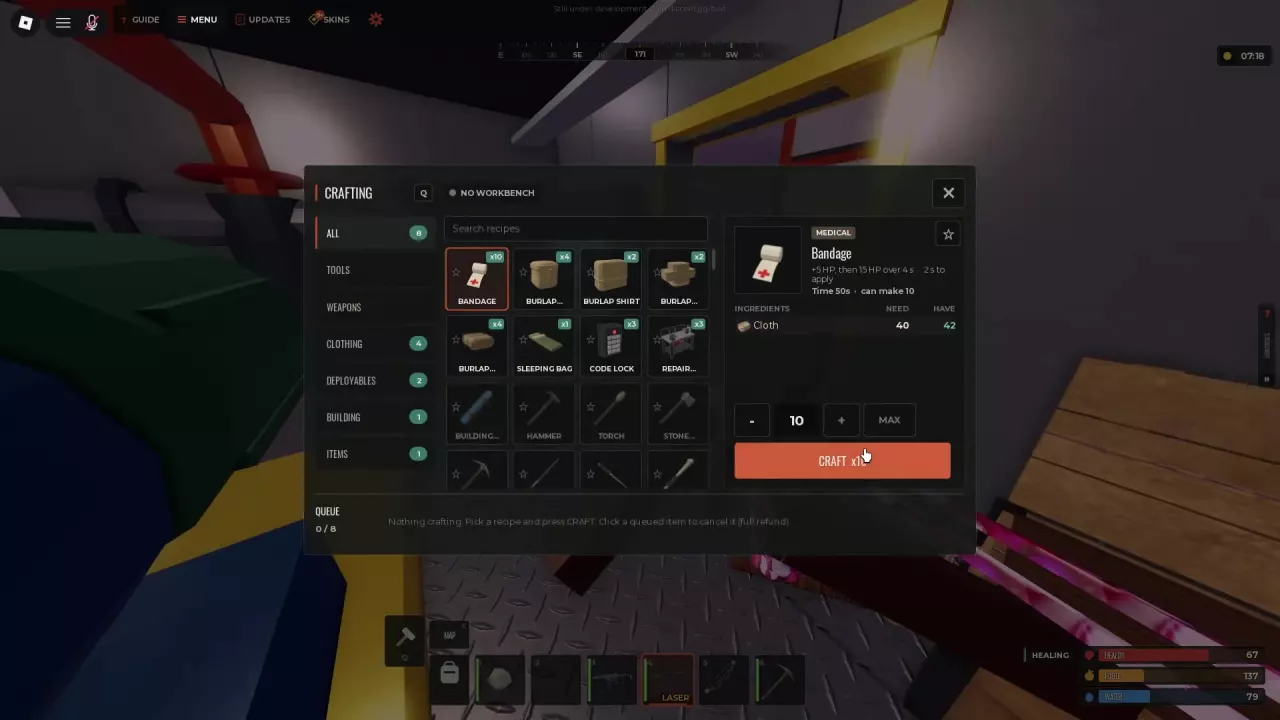
Each Bandage requires 4 Cloth and no Workbench. Budget 4 × your desired number of Bandages in Cloth. See resources and their sources when you need to replenish materials.
- Press Q to open Crafting and select Bandage.
- Set the quantity with the quantity controls, or choose MAX.
- Check the Cloth requirement and displayed batch time, then click CRAFT.
- Close the menu and continue moving while the queue runs. Completed Bandages enter your inventory or hotbar.
If the queue displays INVENTORY FULL, free space for the next Bandage. Crafting resumes once room is available. The backpack guide explains storage and inventory management.
Crafting time depends on the server configuration and selected batch:
| Crafting setup | Quantity | Cloth required | Displayed crafting time |
|---|---|---|---|
| Oil Rig setup, single recipe | 1 | 4 | 5 seconds |
| Oil Rig setup, batch | 10 | 40 | 50 seconds |
| 10x Modded, single recipe | 1 | 4 | 1 second |
| 10x Modded, batch | 46 | 184 | 23 seconds |
Use the menu's displayed total to plan your wait. The 10x single-item display and batch total should not be treated as one fixed seconds-per-item rate.
Prepare for a Death and Return
Craft a Sleeping Bag with 30 Cloth and place it inside your base to establish a respawn point. It requires no Workbench. Keep spare healing supplies and equipment in storage there so a death does not leave your entire recovery kit at the death location.
A placed bag must be available before you can use it to respawn. Follow the Sleeping Bags and loot recovery guide for placement, READY and cooldown states, choosing a respawn point, and retrieving dropped items.