Fust Survival Armor: Clothing, Protection and Layering
Last updated:
Build an outfit that protects the body regions you need. Find armor and clothing sources, fill compatible equipment slots, and compare protection before replacing a piece.
19 objects
Find clothing and armor by body region, individual protection and acquisition route.
Wood Armor Pants
Body region
Legs
Protection
12 %
(Individual item.)
Acquisition
Wooden, Military, and Elite Crates; player backpacks
(Loot examples include a Trainyard Wooden Crate, Dome and industrial Military Crates, and an Elite Crate.)
Workbench level
—
Cloth required
—
Type
Armor
More details
Wear controls
Right-click, double-click, or drag onto your character.
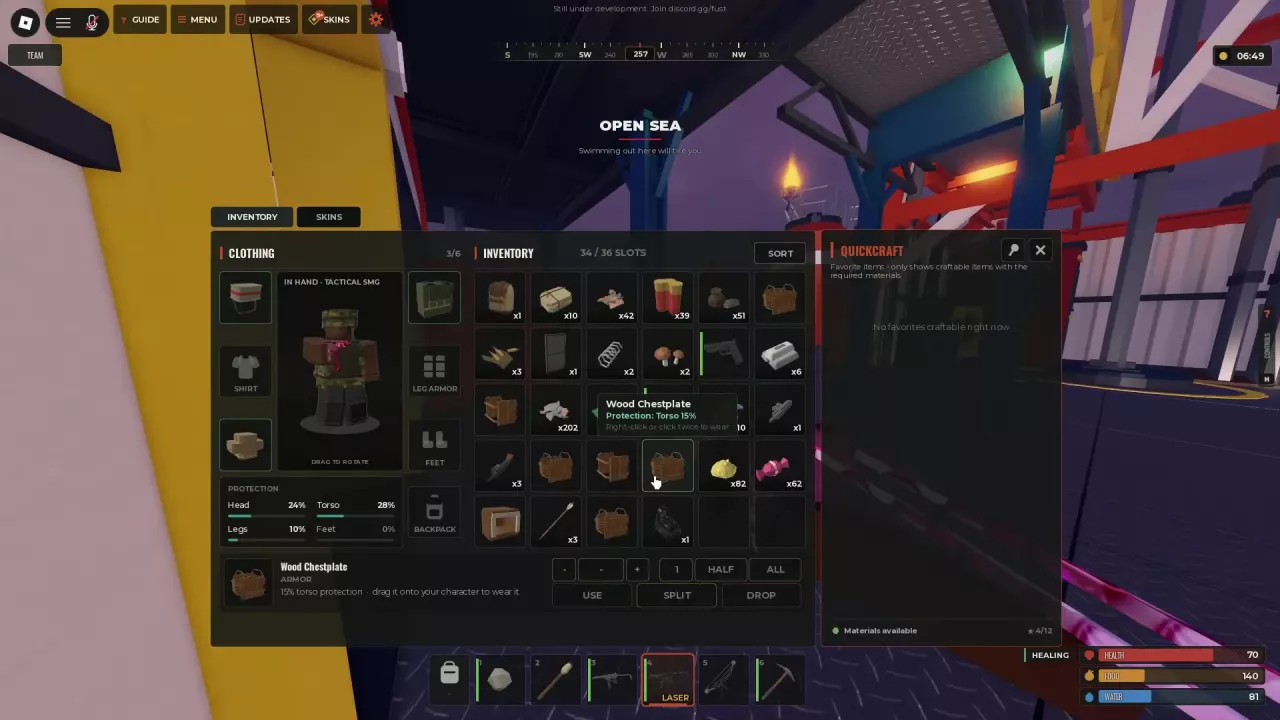
Wood Chestplate
Body region
Torso
Protection
15 %
(Individual item.)
Acquisition
Military Crates; Caravan Strongbox; Guard, Soldier, and player loot
(Military Crate examples include Dome, Oil Rig, and a tower location.)
Workbench level
—
Cloth required
—
Type
Armor
More details
Wear controls
Right-click, double-click, or drag onto your character.
Hide Hood
Body region
Head
Protection
—
Acquisition
Player backpack; Crafting recipe
(Looted from a player backpack; also listed in Crafting.)
Workbench level
—
Cloth required
—
Type
Clothing
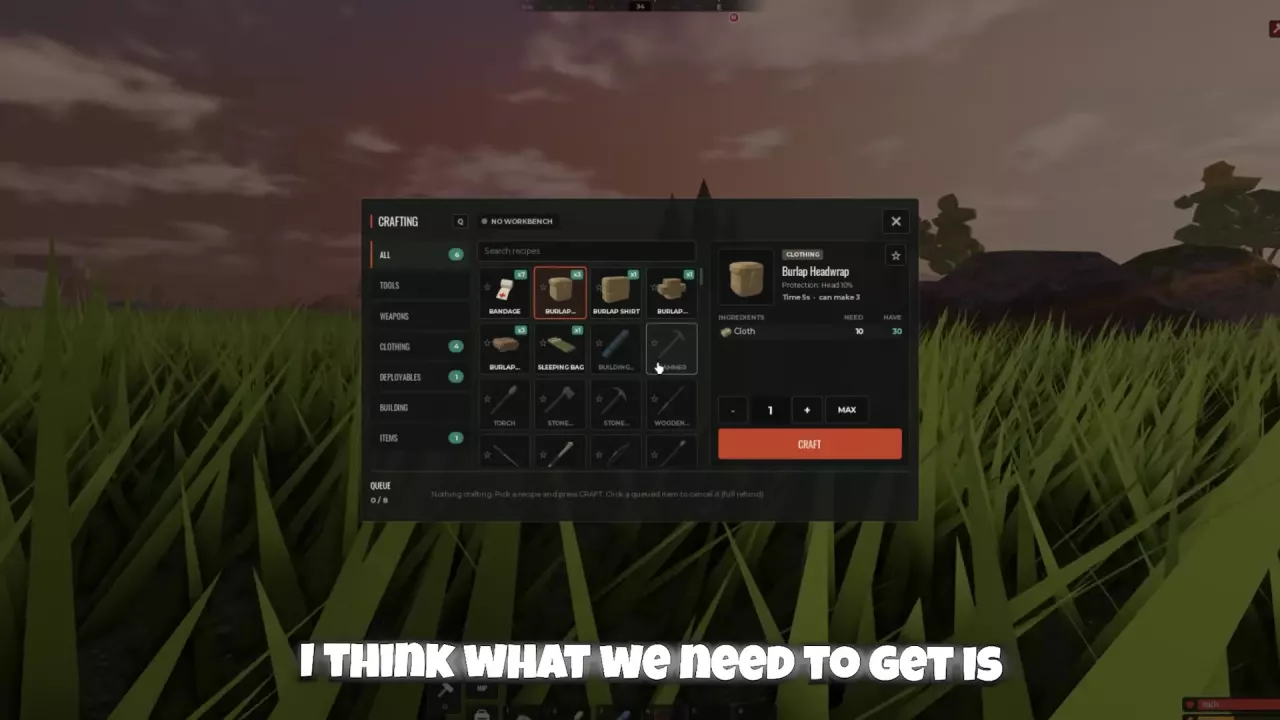
Burlap Headwrap
Body region
Head
Protection
10 %
(Individual item.)
Acquisition
Crafting; Guard and Soldier loot; exploration
(Loot examples include Oil Rig Guards, Military Tunnels Soldiers, and Trainyard Guards.)
Workbench level
—
Cloth required
10 Cloth
(Per headwrap.)
Type
Clothing
More details
Crafting time
5 seconds
(Per headwrap.)
Workbench required
No
(Recipe is available with NO WORKBENCH.)
Wear controls
Drag onto your character.
Burlap Shirt
Body region
Torso
Protection
10 %
(Individual item.)
Acquisition
Crafting recipe; Guard, Soldier, and player loot
(Also obtained during Rail Depot exploration.)
Workbench level
—
Cloth required
—
Type
Clothing
More details
Wear controls
Right-click or double-click.
Outfit example
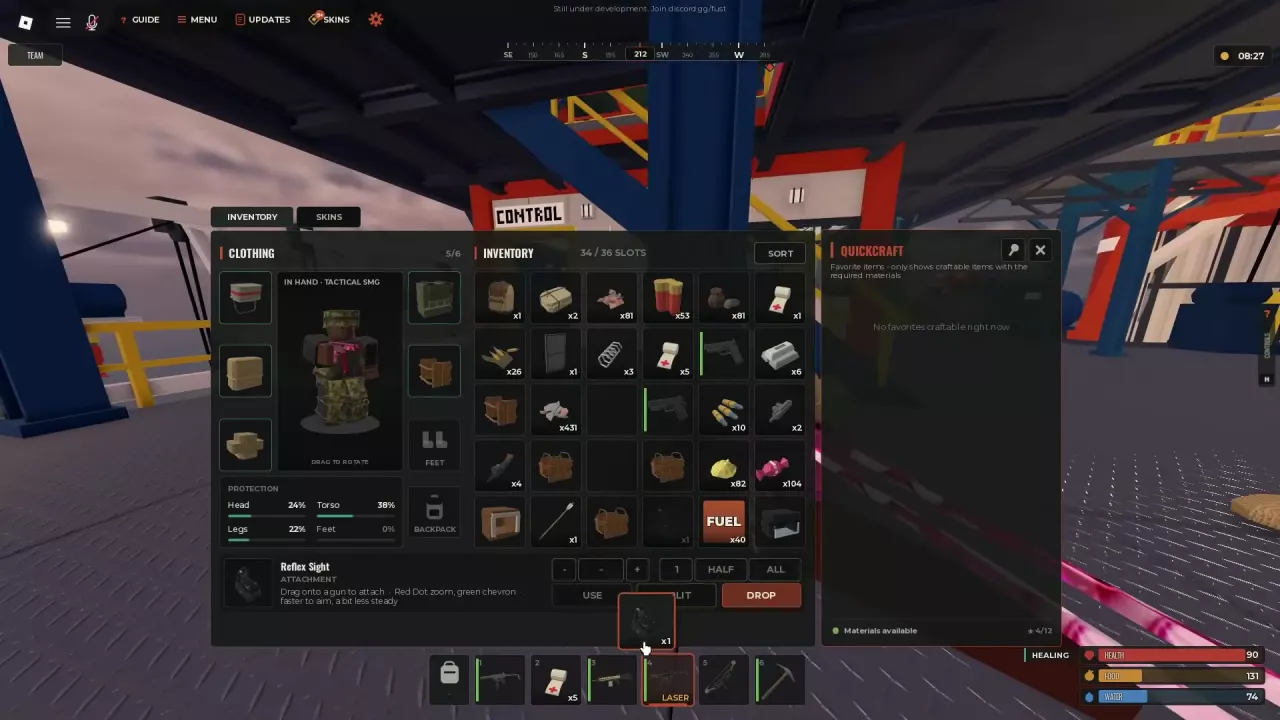
Adding the shirt increased Torso protection from 28% to 38%.
(Oil Rig outfit before replacing its chest equipment.)
Burlap Trousers
Body region
Legs
Protection
10 %
(Individual item.)
Acquisition
Wooden Crates; Guard, Soldier, and player loot; exploration
(Examples include an Oil Rig Wooden Crate, Oil Rig and Trainyard Guards, Military Tunnels Soldiers, and Rail Depot exploration.)
Workbench level
—
Cloth required
—
Type
Clothing
More details
Wear controls
Right-click, double-click, or drag onto your character.
Burlap Shoes
Body region
Feet
Protection
—
Acquisition
Guard, Soldier, and player loot
(Examples include Oil Rig Guards, Military Tunnels Soldiers, Trainyard Guards, and player backpacks.)
Workbench level
—
Cloth required
—
Type
Clothing
More details
Additional loot example
Collected during wooden-box looting on an offshore facility.
(The exact interaction producing the item is not specified.)
Coffee Can Helmet
Body region
Head
Protection
24 %
(Individual item.)
Acquisition
Caravan Strongbox; player backpacks
Workbench level
—
Cloth required
—
Type
Clothing
More details
Description
A mid-tier helmet made from a dented can with a cloth chin strap.
Wear action
Select WEAR in Inventory.
Riot Helmet
Body region
Head
Protection
—
Acquisition
Elite Crate; Caravan Strongbox; Oil Rig Locked Crate; player loot
Workbench level
—
Cloth required
—
Type
Helmet
Road Sign Jacket
Body region
Torso
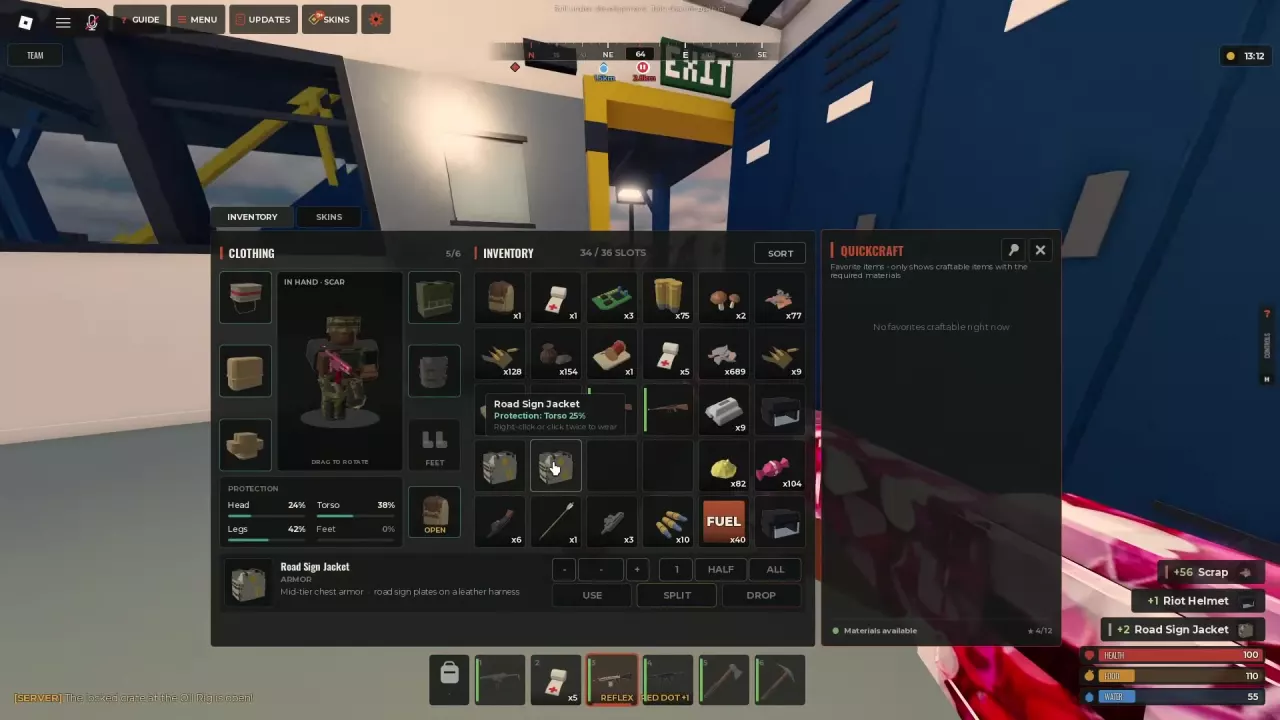
Protection
25 %
(Individual item.)
Acquisition
Oil Rig Locked Crate; player backpacks
Workbench level
—
Cloth required
—
Type
Armor
More details
Description
Mid-tier chest armor made from road sign plates attached to leather straps.
Wear controls
Right-click or double-click.
Replacement example
Replacing the occupied chest equipment changed the outfit's Torso protection from 38% to 35%.
(Oil Rig outfit; the replaced chest item returned to Inventory.)
Can occupy the chest position while this item occupies the separate shirt position
Burlap Shirt (The Oil Rig outfit retained its shirt when Road Sign Jacket was equipped.)
Road Sign Kilt
Body region
—
Protection
—
Acquisition
Player loot
(Obtained after a player encounter and from Luis's Backpack.)
Workbench level
—
Cloth required
—
Type
Armor
Metal Facemask
Body region
Head
(Equipped in the head position.)
Protection
—
Acquisition
Caravan Strongbox; Oil Rig Locked Crate; player backpacks
Workbench level
—
Cloth required
—
Type
Armor
Metal Chest Plate
Body region
Torso
Protection
—
Acquisition
Oil Rig Locked Crate; player backpacks
Workbench level
—
Cloth required
—
Type
Armor
Heavy Plate Pants
Body region
Legs
Protection
—
Acquisition
Oil Rig Locked Crate; player backpacks
Workbench level
—
Cloth required
—
Type
Armor
Combat Pants
Body region
Legs
Protection
—
Acquisition
Oil Rig Locked Crate; player backpacks
Workbench level
—
Cloth required
—
Type
Pants
Hide Vest
Body region
Torso
Protection
—
Acquisition
Player backpacks; Crafting recipe
(Also obtained during Trainyard exploration.)
Workbench level
—
Cloth required
—
Type
Clothing
Hide Pants
Body region
Legs
Protection
—
Acquisition
Player backpacks; Crafting recipe
Workbench level
—
Cloth required
—
Type
Clothing
Hide Boots
Body region
Feet
Protection
—
Acquisition
Player backpacks; Crafting recipe
Workbench level
—
Cloth required
—
Type
Clothing
Bone Helmet
Body region
Head
Protection
—
Acquisition
Crafting recipe
Workbench level
1 level
(Recipe is marked WB1.)
Cloth required
—
Type
Helmet
Armor and Clothing Directory
Browse the 19 armor and clothing pieces by type, body region, protection, and acquisition route. Open More details on an entry for its additional properties and crafting requirements.
For a first outfit, start with craftable Burlap Headwrap and add looted clothing and wooden armor. If you already have equipment, compare pieces covering the same body region and keep compatible clothing layers equipped.
The equipment area separates HEAD, SHIRT, PANTS, CHEST, LEG ARMOR, FEET, and BACKPACK. A body region can have more than one relevant equipment slot: SHIRT and CHEST both contribute to torso protection, while PANTS and LEG ARMOR cover the legs.
Press Tab to open Inventory and find the CLOTHING area.
Right-click or double-click an armor or clothing item, drag it onto your character, or select WEAR when that action is available.
Confirm that the item appears in its equipment position.
Read the affected Head, Torso, Legs, or Feet value in the protection panel.
While a loot or storage container is open, hold Alt and click an armor item to wear it directly. Equipping a replacement in an occupied slot returns the previous piece to Inventory; it does not create another layer in that slot.
Choose Protection by Body Region
Choose upgrades for the region you want to protect. These comparisons use individual item protection and compatible clothing layers.
Body region
Choice
Recommendation
Head
Coffee Can Helmet: 24%; Burlap Headwrap: 10%
If you have both, choose Coffee Can Helmet for 14 percentage points more individual Head protection. Headwrap is a useful craftable starting option.
Torso
Road Sign Jacket: 25%; Wood Chestplate: 15%
Choose Road Sign Jacket over Wood Chestplate for 10 percentage points more individual Torso protection.
Torso clothing
Burlap Shirt: 10%
Fill an empty SHIRT slot even when you already wear chest armor. The shirt uses a separate position.
Legs
Burlap Trousers: 10%; Wood Armor Pants: 12%
Wear trousers and leg armor together. This combination can give 22% Legs protection.
Prioritize an empty compatible clothing slot before replacing a useful piece just because you found another armor item. A shirt or trousers can improve coverage while letting you keep the armor already worn over that region.
Use an item’s tooltip to read its individual protection. Use the PROTECTION panel beneath your character to read the current outfit’s result for each body region.
Adding a layer and replacing armor have different effects. For example, an Oil Rig outfit with 28% Torso protection reached 38% after adding a Burlap Shirt: a gain of 10 percentage points. Replacing that outfit’s existing chest equipment with a Road Sign Jacket then changed Torso protection from 38% to 35%, a loss of 3 percentage points. The jacket’s own value remained 25%.
Judge a swap by the before-and-after value for the affected region. If it falls and your goal is greater protection there, switch back to the previous piece.
Head, Torso, Legs, and Feet are separate readings; do not add them into one overall damage-reduction percentage. Likewise, a loadout showing 38% Head protection while wearing Metal Facemask gives an outfit result, not a standalone specification for the facemask.
Craft and Loot an Early Outfit
Craft a Burlap Headwrap
Burlap Headwrap is a practical first craft: it gives 10% Head protection and requires no workbench.
Put 10 Cloth per headwrap in your inventory.
Press Q to open Crafting.
Find Burlap Headwrap using search, the recipe list, or the CLOTHING category.
Select the quantity and press CRAFT. Each headwrap takes 5 seconds.
Once it is ready, open Inventory and wear it.
Crafting also includes Burlap Shirt, Hide Hood, Hide Vest, Hide Pants, and Hide Boots. Select their recipes to view the required materials. Bone Helmet requires Workbench Level 1, shown as WB1. The crafting queue holds up to eight entries; clicking a queued entry cancels it and refunds its materials in full.
Find clothing and armor while looting
Use nearby clothing and wooden armor opportunities to fill empty slots, then pursue more demanding loot sources when you are equipped for the trip. The items below are possible finds, not a fixed bundle from every container or enemy.
Loot source
Armor and clothing you can find
Wooden Crates
Wood Armor Pants at Trainyard; Burlap Trousers at Oil Rig
Military Crates
Wood Chestplate at Dome, Oil Rig, and a tower location; Wood Armor Pants at Dome and an elevated industrial location
Burlap clothing, including Headwrap and Shoes, plus Wood Chestplate
Elite Crates
Riot Helmet at Oil Rig; Wood Armor Pants
Caravan Strongbox
Coffee Can Helmet, Riot Helmet, Wood Chestplate, and Metal Facemask
Oil Rig Locked Crates
Road Sign Jacket, Riot Helmet, Heavy Plate Pants, Metal Chest Plate, Metal Facemask, and Combat Pants
Approach closely enough to use E OPEN or E LOOT, then take individual items or choose TAKE ALL with inventory space available. If a Strongbox reports that you are too far away, move closer. A Locked Crate must finish unlocking before you can loot it; see loot crates and hacking for the opening process. See the NPC guide for fighting and looting Guards and Soldiers.
Dropped player backpacks provide another route to clothing and armor, including Hide pieces and Road Sign Kilt. Their contents depend on what the player carried. Store useful spares in a base equipment box so you can open it with E and re-equip after respawning.
Use an owned gear kit
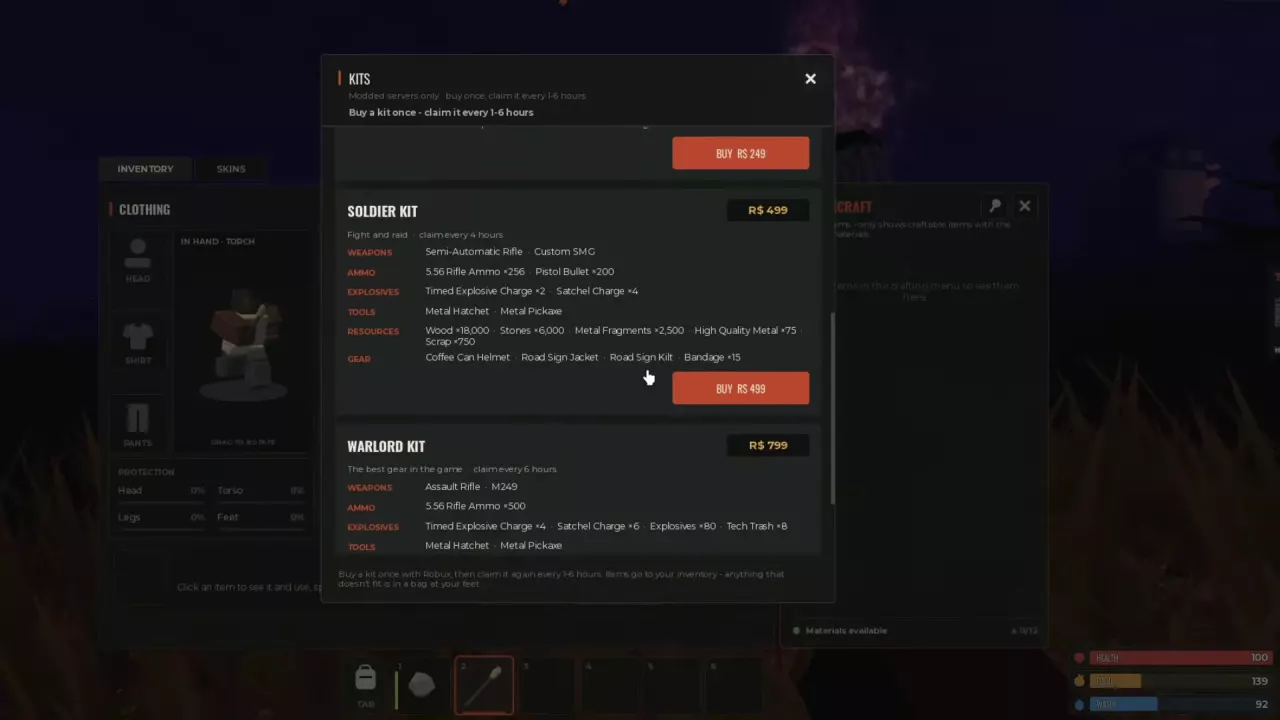
On modded servers, owned kits can be claimed through KITS every 6 hours. Starter Kit includes burlap gear, Survivor Kit includes wood armor, Soldier Kit includes road sign armor, and Warlord Kit includes metal armor. Warlord Kit cannot be used during the first 2 hours after a wipe. Compare kit contents and claim rules before choosing a kit.
Compare Fust Survival kits by price, weapons and raiding supplies. Choose your loadout and learn Modded-server claim rules, cooldowns and wipe restrictions.